I see it more often than I’d like: clients send over audio files that are either teetering on the edge of distortion or are already “crunchy” and unusable. We’ve all heard that harsh, grating sound of a clipped signal.
In 99% of cases, this isn’t due to bad luck — it’s a simple lack of recording hygiene. Specifically, we’re talking about Input Gain (Preamp level) on your microphone or audio interface.
The Golden Rule of Audio Production
Here is the hard truth: digital distortion is destructive. Unlike some analog saturation, digital clipping actually deletes parts of your audio information. While modern restoration tools are impressive, they can never restore the original fidelity 100%.
The golden rule remains: A high-quality source recording is non-negotiable. As an engineer, I want to enhance your product, not spend hours trying to save it from technical failure.
The 2-Second Fix
The good news? This is a fix even a complete beginner can handle in seconds. It all comes down to two places:
- Hardware Gain: The physical knob on your microphone or audio interface.
- Software Levels: The input slider within your OS settings.
(see these illustrations below)
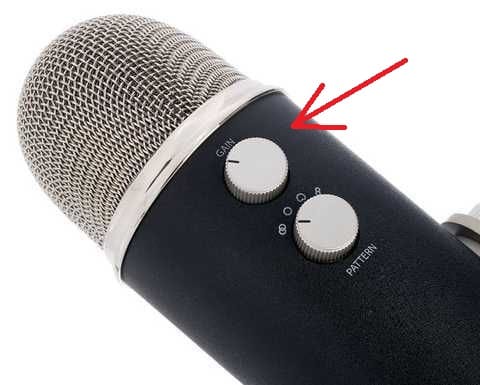
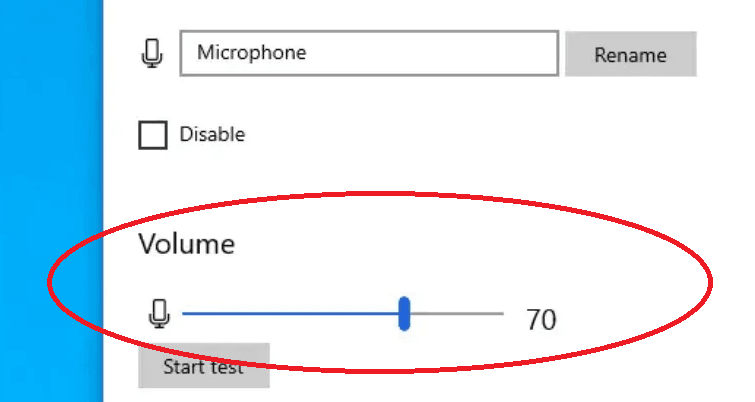
Yes, it really is that simple! Aim for your peaks to hit around -12 to -6 dB. This gives us enough “headroom” to work with during mastering without hitting the red zone.
Don’t Record Twice — Test Once
Before you commit to recording a 10-hour audiobook, stop. Talk to your engineer first.
- Send a 2-minute test clip and wait for the “green light” from the studio.
- Only then proceed with the full session.
If you are new to the mic and feel overwhelmed, I have a Quick Start Checklist ready for you. It’ll save you time, money, and the heartbreak of a rejected ACX upload.
Need professional audio production or technical advice for your next project? Don’t hesitate to reach out — let’s make sure your voice sounds exactly the way it should!