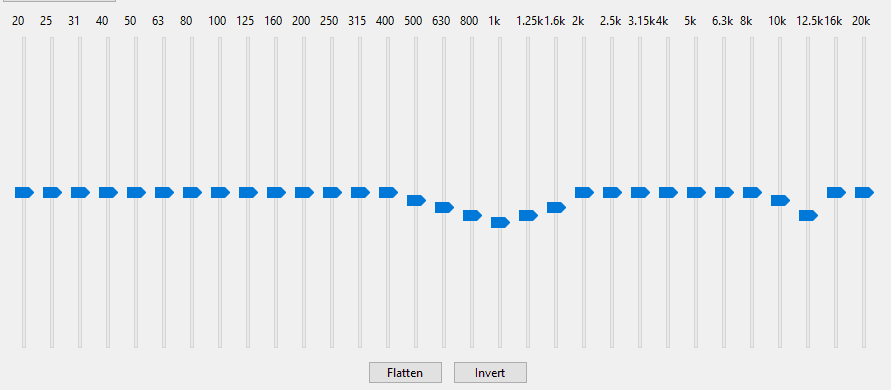
Preset EQ curves rarely work.
Every voice, microphone, and recording space creates a unique combination of resonances, room modes, and tonal characteristics. Applying a generic “Voiceover Preset” often leads to a harsh, muddy, or unnatural sound.
Understanding where specific tonal issues live on the frequency spectrum allows you to fix problems precisely without destroying the natural timbre of your voice.
Here is a practical breakdown of the key frequency zones for spoken-word audio.
1. 80 Hz and Below — The Sub-Bass & Rumble Zone
- The Problem: HVAC noise, desk thumps, traffic rumble, or “plosives” from overly exaggerated “P” and “T”.
- The Fix: Apply a High-Pass Filter (Low-Cut). Set a sharp roll-off around 80 Hz for male voices and 90–100 Hz for female voices.
- Why it matters: Cutting this unusable energy frees up headroom for your compressors and limiters down the chain.
2. 80 Hz – 200 Hz — The “Body” Zone or a Fundamental Tone
Area where the “body” or “warmth” of your voice sits. Gently play with this area and see how you can improve your voice. Frequencies 80 – 100 Hz are for male voices, the higher ones — for female.
3. 200 Hz – 500 Hz — The Boxy “Chest” Zone
- The Problem: The voice sounds muddy, muffled, or like it was recorded inside a cardboard box or a small closet. This is a very common issue in untreated home booths.
- The Fix: Use a moderate dip -3 to -6 dB in this area.
4. 600 Hz – 1,200 Hz — The Nasal “Honk” Tone
- The Problem: The voice sounds thin and overly nasal — as if you are speaking with a blocked nose or through a megaphone.
- The Fix: Take your time and try to find the offending frequency area between 600 and 1,200 Hz, then make a moderate cut (around -3 to -6 dB).
- Caution: Over-cutting here can hollow out the natural character of your voice, making it sound unnaturally scooped or disconnected. Make precise, surgical adjustments rather than wide dips. Don’t get too keen.
5. 2.5 kHz – 5 kHz — Presence, Clarity, and Intelligibility
- The Problem: The voice sounds dull, distant, or lacks articulation, making words hard to distinguish against background music or in noise-heavy environments.
- The Fix: Apply a subtle boost (plus 1–3 dB) in this area.
- Caution: This region is extremely sensitive to human hearing. Pushing it too hard introduces harshness and listener fatigue.
6. 6 kHz – 10 kHz — The Sibilance Danger Zone
- The Problem: Piercing “S”, “Z”, and “SH” sounds that cut sharply through the mix and irritate the listener’s ears.
- The Fix: play with this area and try to find the offending spot.
- Pro Tip: Avoid deep and wide EQ cuts here. They can make the voice sound like it has a lisp. Also, consider using a De-Esser.
7. 12 kHz and Above — Air and Studio Sheen
- The Problem: The voice feels heavy, closed-off, or lacks high-end detail.
- The Fix: A gentle boost (plus 1–3 dB) starting above 12 kHz adds openness and a professional sheen.
- Caution: Only boost this range if your recording environment and microphone are quiet. Otherwise, you will boost room hiss and preamp noise.
And Yet — Why Presets Fall Short
While frequency charts provide a roadmap, exact EQ points vary based on room geometry, polar patterns, and natural vocal timbre. Tuning these frequencies blindly can quickly result in phase issues or an over-processed tone.
If you are struggling to get your audiobook or podcast to pass technical quality standards (such as ACX or Audible requirements), a custom processing chain tailored to your exact setup is always superior to a generic preset.
Need help dialing in the perfect signal chain for your voice and microphone? Need someone to prepare the entire audiobook for publishing for you..?
Contact me for a custom processing chain or a free sample test of your audio.