
If you’ve decided to record your audiobook using a laptop or a non-specialized microphone setup, it can work — but only if you follow this crucial rule: Disable every single built-in “audio enhancer” in your operating system and recording software.
Designed for Calls, Not for Books
Windows and macOS often come with pre-installed features like “Noise Suppression,” “Acoustic Echo Cancellation,” or “Voice Enhancement.” These tools are designed for VoIP (Zoom, Skype, Teams), where the goal is simply to make your voice audible over background noise.
In a business call, the artifacts left behind by these filters don’t matter much. But for an audiobook, they are a disaster.
The Hidden Cost of “Free” Noise Reduction
These built-in algorithms work aggressively. While they might successfully hide the static hum of your laptop’s fan, they do so by “eating” the natural frequencies of your voice. The result?
- An “underwater” or metallic/robotic sound.
- Sudden drops in volume.
- Unnatural clipping of the ends of your words.
For a professional engineer, these artifacts are much harder to remove than a steady background hiss. It is always better to send me a raw recording with a bit of fan noise than a “processed” one that sounds like a low-bitrate MP3 from early 2000-s.
What to Disable (Examples)
Go into your System Sound Settings or your DAW preferences and look for anything that loooks like this:
- “Signal Enhancements”
- “Noise Suppression”
- “Background Noise Removal”
- “Ambient Noise Reduction”
- etc
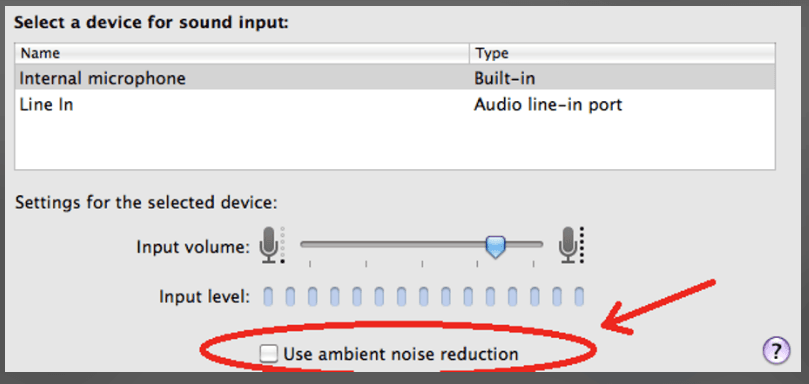
macOS
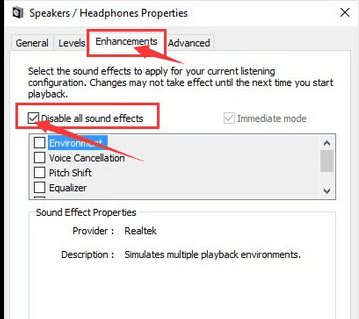
Windows
The Golden Step: The Test Sample
Before you spend hours recording a chapter, please send a 2-minute raw test clip to your engineer. Let me check if there are any hidden filters still messing with your signal.
Ready to start your audiobook or have technical questions? Reach out and let’s discuss your project!